(continued from Fast Bookings screen)
The first step in creating a booking is to enter the basic booking detail – Booking name, travel date, Pax names and other accounting and analysis information into the booking. This is done using a ‘wizard’ which steps through the stages necessary to create the booking.
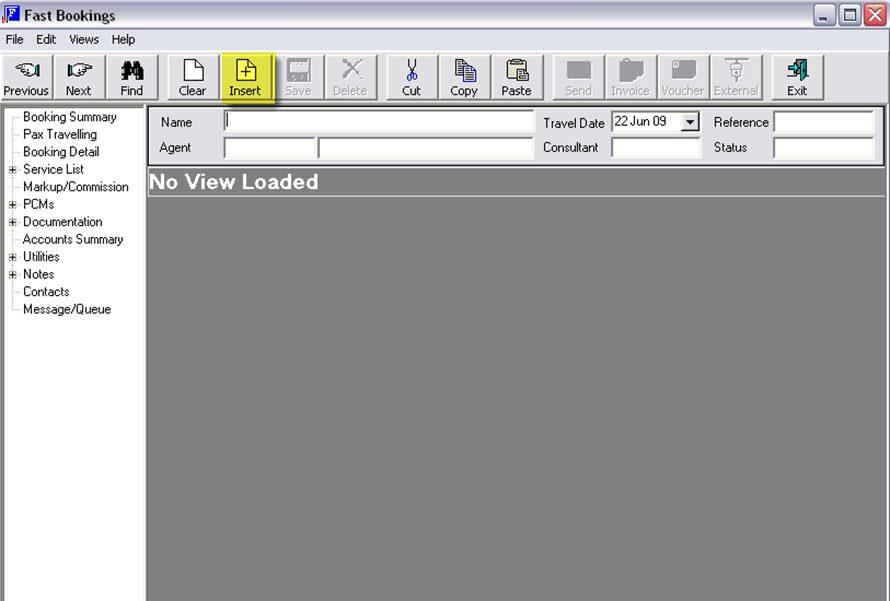
Screen Shot 6: Create New Booking - Screen 1
Click the ‘Insert’ button (yellow highlight in the screen shot) from the FastBook window, to begin a new booking. This starts the New Booking wizard. The booking wizard steps you through the three screens of the booking header in the correct order.
There are certain fields where an entry is required and if entries have not been made in these fields, a warning message will display advising what data is required.
On completion of all mandatory set up fields, the wizard is turned off while the services are added to the booking.
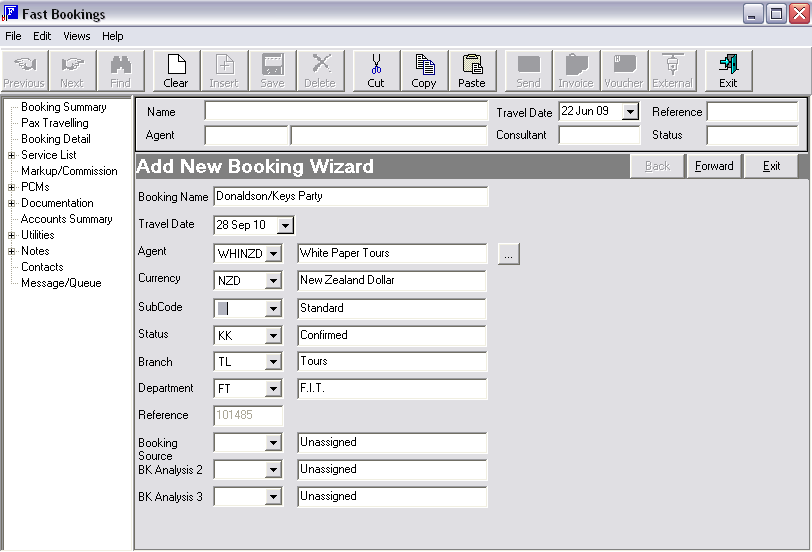
Screen Shot 7: Add New Booking Wizard - Screen 1
|
|
FastBook is also able to be used in a mode where a default Booking Name can be displayed along with a numeric value. By setting various FastBook INI switches, this ‘Quotation/Booking’ Mode can be turned on and FastBook can be then used to provide a Quotation which can then be turned into a booking. As well, this feature allows a simple ‘Service Lookup’ function without creating a booking. Screen Shot 7: Add New Booking Wizard - Screen 1 above is the Wizard screen that displays in standard Booking mode. See also Wizard Screen – Quotation Mode (Elective option). |
Booking Name (60 Characters)
Fastbook has provision for a booking name as well as room names and passenger names. The booking name and room name could quite often be the same – e.g., Smith Mr./Mrs. F. There will be instances where the booking name and room name(s) will not be the same – e.g. booking name Smith/Brown Party and room names of Smith Mr./Mrs. and Brown Mr./Mrs. Room names are entered in the Pax Travelling screen.
|
|
If the booking name already exists, then, subject to system settings, a warning may appear, or a password may be required to continue, or the entry of the name may be denied. If name entry is denied, the booking name has to be altered e.g. add a Period (.) after the passenger(s) name or initials. |
Travel Date (Date)
This is normally the date of the first service being provided. Some Tourplan user companies use different dates – e.g., date of departure from home country. If any date other than date of first service is to be used as the travel date, it is a decision taken by each user company.
|
|
Care should be taken when entering the Travel Date, since this determines the accounting period that transactions for the booking will inherit. The Travel Date can be altered using the Change Travel Date utilityfeature. |
Agent (Dropdown)
Select the agent from the drop-down list. Entering the first few characters of the agent code and clicking the dropdown will search from that point forward in the drop down list. If the agent is not listed, it will have to be created in the Debtors module
|
|
Dependant on system settings, a warning may display advising that the agents credit limit his exceeded. Again, dependant on the settings, entry of the booking could be denied. These settings are user company specific. |
Currency (3 characters)
The agent’s default sell currency, as setup in the Debtors module, is displayed. The currency may be changed for this booking by selecting an alternative currency from the drop-down list.
|
|
Only currencies which have been attached to the agent in the Debtors Module will display in the drop down list. |
|
|
Currency rates between the Agent currency selected and the system currency (normally the currency of the country the system is domiciled in) must first be entered in the system currency exchange rate table. |
(continued in Agent Currencies, Booking Currencies, Service Currencies & Invoice Currency)
 Tourplan iS V2.07 FastBook Training Guide
